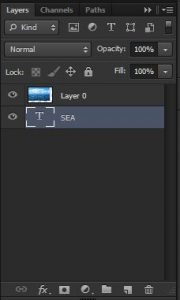
Hello! Today I am going to show you that how can we do Clipping Mask in Photoshop. With the help of Clipping Mask we can see our image in the text or shape, and we can easily adjust the position of our image inside the text or shape at any stage. There are two types of Masking in Photoshop. The first one is Layer Mask, and the second one is Clipping Mask. Before this tutorial I have already a tutorial on How to use Layer Mask in Photoshop. And now I am making this tutorial on Clipping Mask in Photoshop. So first of all open a new document. Than open an image that you want to use for Clipping Mask. After that make any shape or type any text. Make sure that the Shape or Text layer is beneath to the image layer as shown in the image below. And to put Text or Shape layer below to the image layer, it is mandatory that it should not be locked. Otherwise you will not be able to move it to up or downward.

Now go to the image layer and right click and choose Create Clipping Mask option. Alternatively, put your cursor on the center of both layers and hold down Alt key and you will see that the our cursor is now changed into a tiny downward arrow and with a little white rectangle in its side. So holding down alt key and click and You will see that image is now inside our Text or Shape that was below the image layer as shown in following image.

After making clipping mask, you have also option to release it again and move to at original view of layers at any stage. For that you have to just right click on the image which we have used for clipping mask, and choose Release Clipping Mask option. Or again put cursor between both layers, press alt key and click to release it similarly as we did it earlier to make it.
Here is the my video tutorial to make it more easier for you to learn clipping mask in photoshop.
 Technowatchpk.com | Hub of Tutorials, Software Reviews, Mobilephone News


Fantastic tutorial about how to do clipping mask in photoshop. I am so happy to get this post. Thank you so much.
Thank you